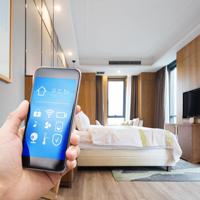
In today's world, smart technology plays a significant role in enhancing home security. With an array of smart security cameras available, installing one can offer peace of mind by keeping an eye on your home, even when you're away. Although the idea might sound daunting, installing a smart security camera can be straightforward with a little guidance.
This guide will walk you through the steps of installing a smart security camera in your home. All you need is a reliable internet connection, a little patience, and the right tools.
Planning Your Camera Installation
Before diving into the installation, it's essential to plan effectively. Consider these points:
Objective: Determine what you want to monitor. Is it the front door, the backyard, or perhaps a specific room inside your home? This will help you choose the right security systems.
Camera Type: Decide between wired and wireless cameras. Wireless cameras offer flexibility in placement, but wired cameras might be preferable in high-traffic areas due to their stability and reliable connection.
Location: Choose strategic locations to place your cameras for optimal coverage. Common spots include doorways, driveways, and isolated areas of the yard.
Lighting: Ensure there's enough light for the camera to function effectively. Some cameras offer night vision capabilities if lighting is a concern.
Gathering Necessary Tools and Materials
Once you've mapped out your plan, gather the necessary tools and materials. These might include:
- Drill with bits
- Screws and anchors
- Ladder
- Ethernet cables (for wired cameras)
- Stable Wi-Fi connection
- Smart security camera and accessories
Step-by-Step Installation Process
1. Set Up the Software
Most smart cameras come with an app or software that you'll need to install on your smartphone or computer. This software allows you to monitor and control the camera remotely.
- Download the app from the App Store or Google Play Store.
- Create an account or log in if you already have one.
- Follow the setup instructions provided by the app to connect your camera to your Wi-Fi network.
2. Physical Installation
For Wireless Cameras:
- Position the Camera: Use the app to determine the field of view and make necessary adjustments.
- Mount the Camera: Use the screws and anchors provided to mount the camera on the wall or ceiling. Ensure it's stable and secure.
- Connect to Power: Plug in the camera to a nearby power source.
For Wired Cameras:
- Run the Cables: Carefully run the Ethernet cable from your router to the camera's location. For more information on setting up your smart home network, see How to Create a Smart Home Network.
- Mount the Camera: Similar to a wireless camera, secure the camera with screws and anchors.
- Connect the Cables: Plug the Ethernet cable into the camera and ensure all connections are tight.
3. Testing the Camera
Once installed, it's critical to test the camera to ensure it's working as intended.
- Check Live Feed: Using the app, view the live feed to confirm the camera is capturing the desired area.
- Adjust Settings: Configure motion detection, recording schedules, and alerts to meet your needs.
- Fine-Tune Positioning: Make any necessary adjustments to the camera's angle or position for optimal performance.
4. Regular Maintenance
To keep your camera operating smoothly, perform regular maintenance checks. This is similar to maintaining your electric bike in that regular care prevents larger issues.
- Clean the camera lens to ensure clear video quality.
- Check the app for firmware updates and apply them as recommended.
- Inspect the physical setup for any signs of instability or damage.
Examples of Smart Security Cameras
There are several brands to explore when choosing a security camera for your home. Some options include:
- Ring: Known for its ease of use and seamless integration with other smart devices.
- Nest Cam: Offers excellent video quality and robust app features.
- Arlo: Ideal for those seeking a wire-free setup with a long battery life.
Conclusion
Installing a smart security camera is a valuable step towards enhancing your home's security. Remember, perfection isn't the goal. Each setup is unique, and it's about finding what works best for your situation.
Take your time with the installation, and don't hesitate to seek advice from professionals if needed. By following the steps outlined here, you're on your way to creating a safer, smarter home environment.
Note: Always refer to the specific installation instructions provided with your smart security camera.